Access
The Horizons interface is accessed via the DCT panel of the TCS.
For Visiting Astronomers
This interface is accessed by the TO, there is no access to it from the instrument control computer ( dct-obs1 / dct-obs2 ). Please communicate with your TO regarding any ephemeris data files you would like created. The process is vastly quicker if you provide an Horizons Object ID number rather than an object name.
This can be a lengthy process, depending upon how much data is required and the search parameters used. It is recommended that all data is created at the beginning of the night, ideally before sunset.
Description
This interface allows one to create a file of ephemeris data containing columns for UT Date and Time, RA and Dec. Thus allowing for the tracking of ephemeris targets by the TCS.
The interface has two panels "Control & Operation" and "Workings". For the purposes of getting data for Science targets during normal nightly operations the "Workings" tab is not required and thus will not be covered in this document.
Control & Operation
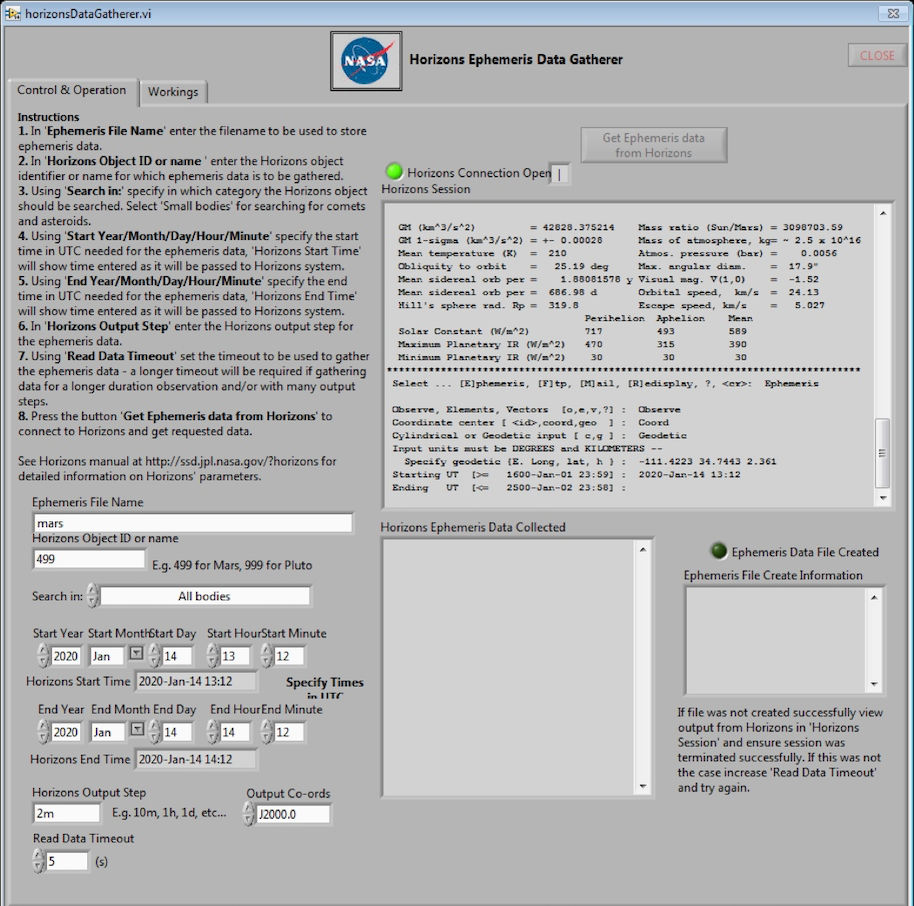
This panel contains several windows and sections, which we shall discuss here separately.
Instructions & Data Entry
In this section of the window instructions for the use of the interface are given
In the 'Ephemeris File Name' enter the filename to be used to store ephemeris data.
Ephemeris File Name
Avoid using the symbols: \ / < > | : * ? " in the file name, as they are not allowed in Windows file names, and will cause an error writing the file (Horizons will collect the ephemeris data, but will not save the file and the green "Ephemeris Data File Created" indicator will not light up)
These files will be written to C:\Program Files\OSL\v1.8.0\builds\DCT\TCS\data\ephem
You cannot enter a different path in the file name - If you need to put the ephemeris file in a different location, create it in the default location and then copy it to wherever you like, but the ephemeris can only be used in TCS from the \data\ephem folder.
In 'Horizons Object ID or name' enter the Horizons object identifier or name for which the ephemeris data is to be gathered.
Horizons Object ID or name
Can enter either a 6 digit Horizons object identifier (rec #) or the objects name (i.e., 2P or 2014 RC).
If using an Horizons Object ID be aware that orbits are updated regularly, thus multiple IDs are available for most objects. It is advisable to double check that the one used is the desired version.
For names that contain years (i.e., 2014 RC) the space between the year and the letter code must be included in order to generate results.
Entering a name will result in additional requirements during the data grab – details will follow.
Using 'Search in:' specify which category the Horizons object should be searched. Select 'Small bodies' for searching for comets and asteroids.
Search in:
This feature eliminates the accidental call of targets with similar names, for example searching with the name: ison if searching all bodies on produces results for major bodies with names close to the search criteria (i.e, moon Isonoe), but if you search small bodies then you get the results for comet Ison.
Default selection is 'All bodies'.
Using 'Start Year/Month/Day/Hour/Minute specify the start time in UTC needed for the ephemeris data, 'Horizon Start Time' will show time entered as it will be passed to the Horizons system.
Start Year/Month/Day/Hour/Minute
Check with the Astronomer if they have a desired start time for the file, else simply ensure that the start time is at or before the start of the desired observation time.
Using 'End Year/Month/Day/Hour/Minute specify the start time in UTC needed for the ephemeris data, 'Horizon End Time' will show time entered as it will be passed to the Horizons system.
End Year/Month/Day/Hour/Minute
Check with the Astronomer if they have a desired end time for the file, else simply ensure that the end time is at around or after sunrise. In this way your data will last at least the entire night.
In 'Horizons Output Step' enter the Horizons output step for the data.
Horizons Output Step
Whatever value you enter in this box must also contain the units. Minimum unit size is m (minutes).
Careful: Too small a time step will result in too large a file, and no file will be created. The time step depends upon the length of the file (UT End - UT Start)
Default is 2m.
Using 'Read Data Timeout' set the timeout to be used to gather the ephemeris data - a longer timeout will be require if gathering data for a longer duration observation and/or with many output steps.
Read Data Timeout
If data is required spanning several nights/weeks or high time resolution positions are desirable this value should be increased. For most purposes simply increasing the step size is sufficient but this may not always be true.
Default is 5.
In 'Output Co-ords' select the reference frame for the output ephemeris data.
Read Data Timeout
As of 2020-Feb, TCS allows for ephemeris data from Horizons to be downloaded in either FK5 / J2000 coordinates or Apparent coordinates. The downloaded file contains a line telling TCS the reference frame.
Default is ________________.
Press the button 'Get Ephemeris data from Horizons' to connect to Horizons and get the requested data.
Get Ephemeris data from Horizons
Upon depression of this button the 'Horizons Connection Open' led should illuminate - if not check the network connection - and a spinning cursor should appear.
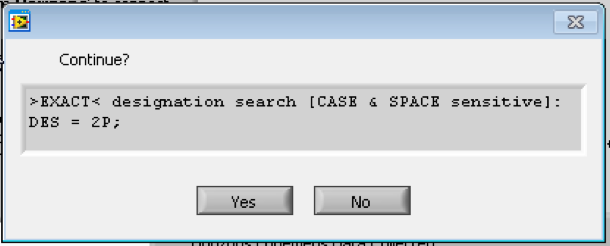
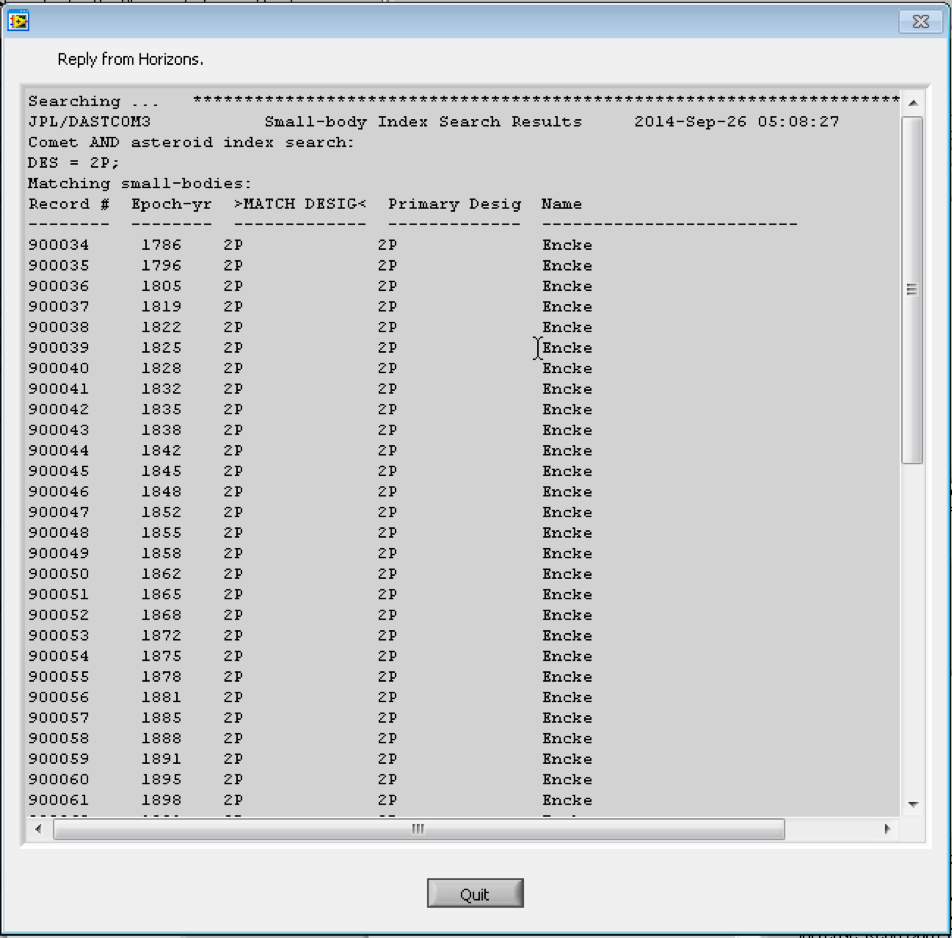
IF you entered a name rather than an ID a dialogue box will appear asking to confirm what you entered. If the comment shows the name you entered (with correct spelling and formatting) pressing YES will proceed. If the format/spelling is incorrect press NO and reenter the name. (This box will appear every time a name is entered and the 'Get Ephemeris data from Horizons' button is depressed – does not appear if an ID # is entered.
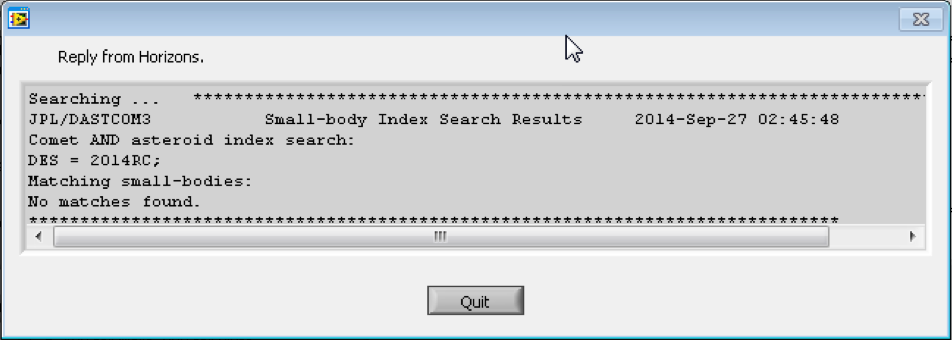
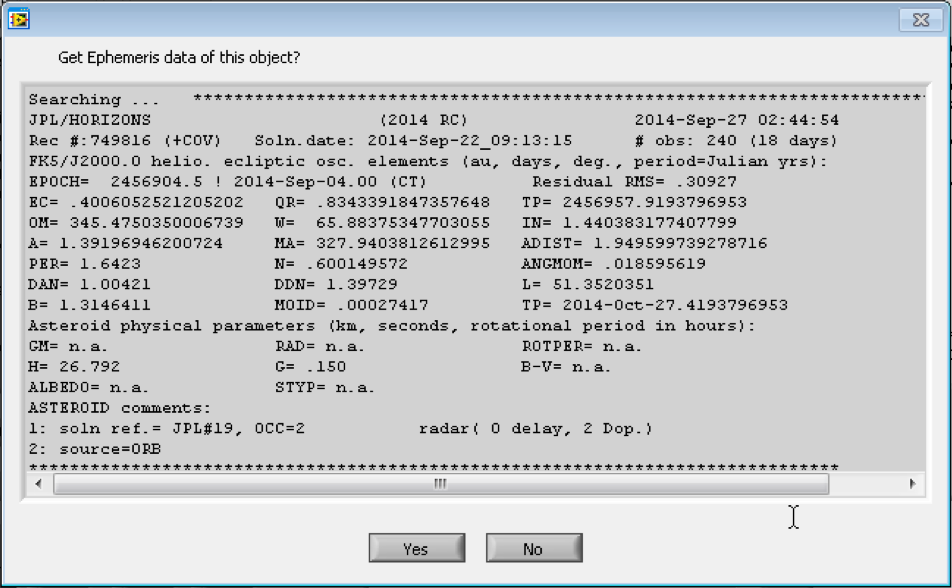
After pressing yes the Horizons database will be searched for matching records. Upon completion of the search a dialogue box will appear: mutliple outcomes result:
i) No record found - The dialogue box indicates that no match was found. Clicking 'Quit' will close the dialogue box. Check that the name entered is formatted correctly (white spaces), or spelled correctly, and that the correct 'Search in' option is selected.
ii) Single record found - The dialogue box will contain the record details. Choosing YES will create the ephemeris file. Choosing NO will cancel.
iii) Multiple records found - The dialogue box will list all entries found in the database, sorted by record #. It this case the desired record (usually the most recent - but check with the Astronomer) must be searched for. Using Ctrl-c, copy the record #. This is the Horizons ID number. Paste into the appropriate box and rerun the search.
Horizons Session
In the upper left of the interface we find the Horizons Session window. This window provides the detailed feedback about the current session. After pressing the 'Get Ephemeris data from Horizons' button this window will begin to fill with the details of the telnet session. What appears in this window is governed by how the session progresses and will vary depending upon how the target ID/name was entered/selected. All of the information contained in any of the dialogue boxes will also be contained within the Horizons Session window; however, it also contains additional information, and should you have entered an Horizons Object ID will be the only source of this information. Should any of this information be of interest, once the Horizons Connection has been quit (by completion of a search; successful or otherwise) you may scroll within this window to see all of the information that was output.
Upon completion of a successful data acquisition sequence this window will contain the details of the record, including the solution. It also contains details regarding the systems interaction with the Horizons database search including, for example, the output table defaults. If an older solution is selected you will see the calculation steps as the solution is propagated forward at the end of which you begin to see the output of the typical Horizons interface, amongst which is the computed data and a footnote to the table containing detailed notes about symbols that might appear in the table. The final messages displayed should be the Quit command followed by the JPL ascii art.
Lower Left
The lower left portion of the 'Control & Operation' panel contains the results of the database query.
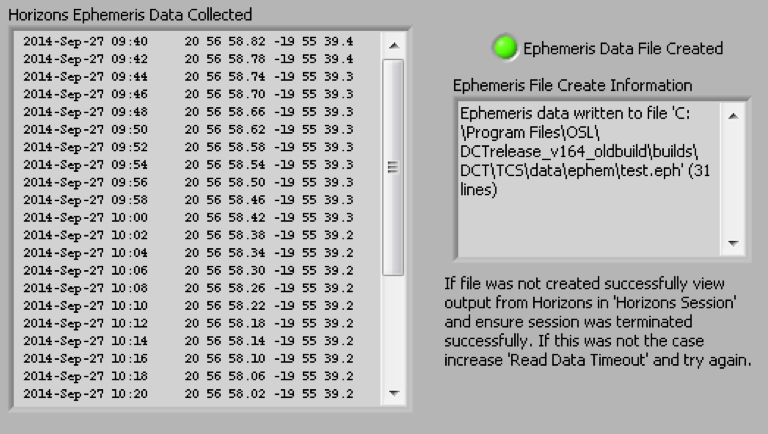
The Horizons Ephemeris Data Collected window shows the data collected that will form the .eph file used by TCS. The file contains the UT Date, UT Time, RA, and Dec, all of which are shown in this panel. The scroll bar allows you to look through all of the data, providing an easy way to check that the start and end times line up with what is required.
When a database query completes successfully and creates the desired file the Ephemeris Data File Created led will be lit. The small window below this led gives the directory tree for the created file as well as detailing the file size. As stated on the interface if there is a problem in creating the file then the cause of that problem will be stated in this same window.
Sending the Target in TCS
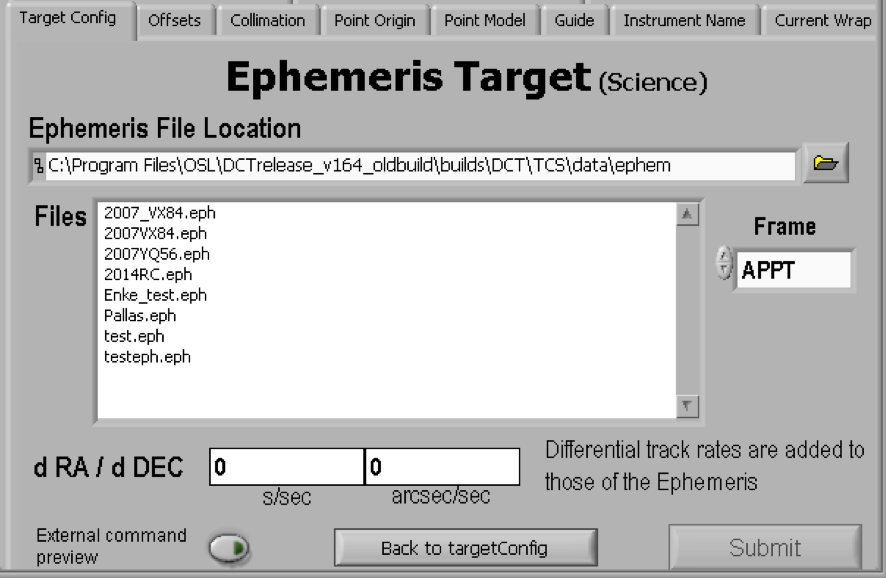
Once the file has been created it will be displayed in the TCS Target Config panel, when the target type Ephemeris is specified. Ephemeris files generated with the TCS Horizons interface will have the reference frame encoded in the last line of the file. Be sure the Frame in the Ephemeris window is set to the same value used when generating the file – but a test on 31 October 2020 indicated that TCS uses the reference frame from the end of the ephemeris file regardless of this setting in the Ephemeris window.
