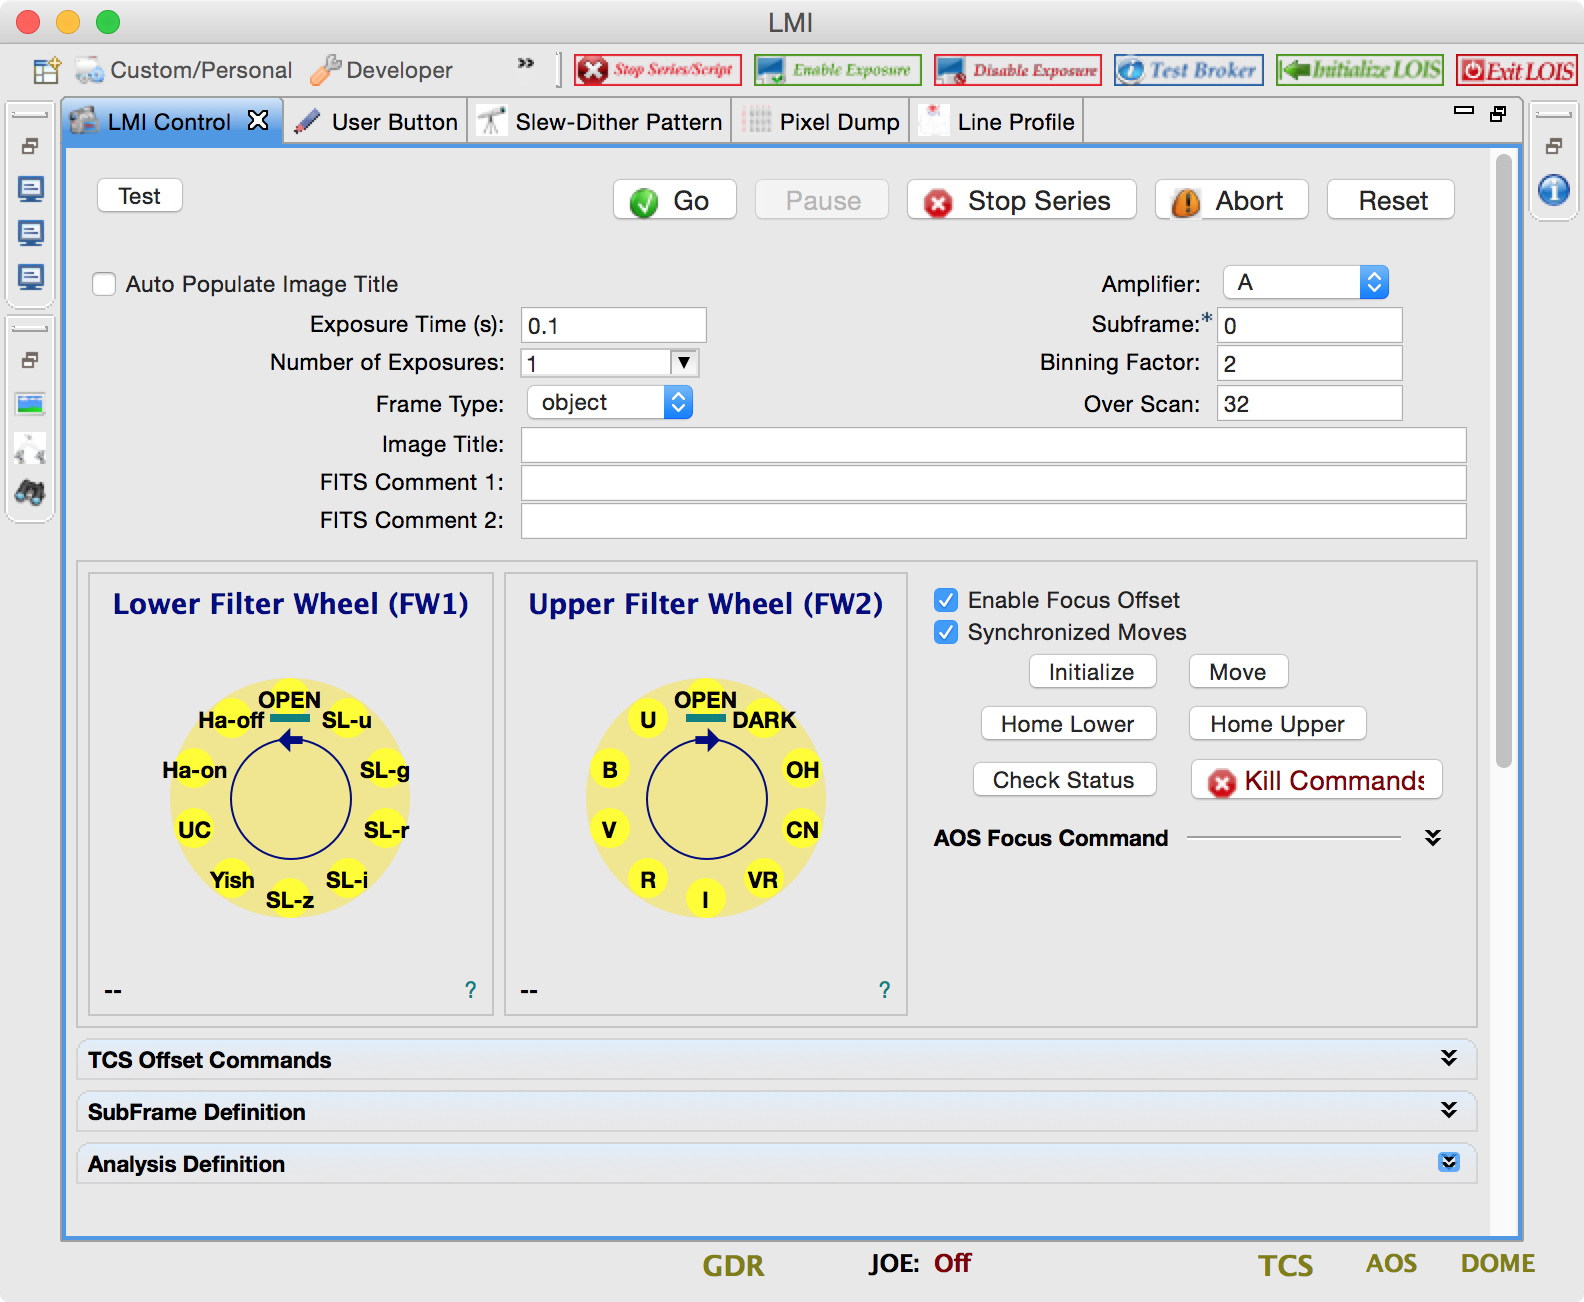
Below you see the LMI Camera Control view which is the primary way for controlling and commanding the LMI. In addition to direct control of the CCD, some other functions related to the instrument can be performed from this view for convenience. For instance, the TCS Offset commands can also be issued by the TOs on the TCS control panel but it is probably more convenient for the astronomer to issue them directly. The main functions available in this view are:
- setup and starting an exposure
- selecting filters
- Issuing the AOS focus command
- Issuing a TCS offset command
- Defining subframes
- setup and issuing analysis command
Tooltips are available for most fields.
Setup & Starting an Exposure
The top section of the view allows the observer to setup and initiate an exposure command. The most common parameters for the exposure command are exposed in this view but for full control of the CCD, one needs to go to the Engineering Mode Control view.
The top row contains the buttons for initiating or stopping the exposure:
- Test - initiates the exposure in test mode so the image is saved in test.fits. This file will be overwritten the next time the button is pressed.
- Go - starts an standard exposure based on the values of the text fields on the view. The image will be saved in a named and numbered file based on the parameters set in the info view.
- Pause - Not implemented yet.
- Stop Series - This will stop the series when the number of exposures is greater than 1. The current exposure will continue.
- Abort - Aborts the current exposure but does not affect the series.
- Reset - Changes all the text field values back to the default startup values which are read from the config file.
The text fields are self-explanatory. One thing to remember is that subframe = 0 means full frame.
